December 16, 2020 by Olivier Goffart and Simon Hausmann
Learn SixtyFPS: Memory Game Tutorial (C++) 
SixtyFPS is a new UI toolkit we are creating for applications running our desktop and embedded. Our first blog post was introducing the project. In summary, SixtyFPS is composed of a markup language that makes it easy to describe the user interface, which is then compiled to optimized C++. In this blog post, we are going to teach the basics of SixtyFPS and how to use it from C++ to create a small game. This is basically a port to C++ of our previous blog post that was targeting Rust.
This tutorial is outdated. Follow the current Slint tutorial instead.
In this tutorial, we are going to demonstrate how to create a simple memory puzzle game with SixtyFPS.
We are going to combine the
.60 language for the graphics with the game rules implemented in C++.
The game consists of a grid of 16 rectangular tiles. When clicking on a tile, an icon underneath is uncovered. We know that there are 8 different icons in total, so each tile has a sibling somewhere in the grid with the same icon. The objective is to locate all icon pairs. Only two tiles can be uncovered at the same time. If they are not the same, then the icons will be obscured again. We need to remember under which tiles the matching graphics are hiding. If two tiles with the same icon are uncovered, then they remain visible - they are solved.
This is how the game looks like in action:
You can also play in your web browser.
Prerequisite
In this tutorial, we use C++ as the host programming language. We also support other programming languages like Rust or JavaScript.
You will need a development environment that can compile C++17 with CMake 3.16. We do not provide binaries of SixtyFPS yet, so we will use the CMake integration that will automatically build the tools and library from source. Since it is implemented in the Rust programming language, this means that you also need to install a Rust compiler (1.48). You can easily install a Rust compiler following the instruction from the Rust website. We are going to use cmake's builtin FetchContent module to fetch the source code of SixtyFPS.
In a new directory, we create a new CMakeLists.txt file.
# CMakeLists.txt
cmake_minimum_required(VERSION 3.16)
project(memory LANGUAGES CXX)

include(FetchContent)
FetchContent_Declare(
    SixtyFPS
    GIT_REPOSITORY https://github.com/sixtyfpsui/sixtyfps.git
    GIT_TAG v0.0.6
    SOURCE_SUBDIR api/sixtyfps-cpp
)
FetchContent_MakeAvailable(SixtyFPS)

add_executable(memory_game main.cpp)
target_link_libraries(memory_game PRIVATE SixtyFPS::SixtyFPS)
sixtyfps_target_60_sources(memory_game memory.60)
This should look familiar to people having used CMake before. We see that this CMakeLists.txt
references a main.cpp, which we will add later, and it also has a line
sixtyfps_target_60_sources(memory_game memory.60), which is a SixtyFPS function used to
add the memory.60 file to the target. We must then create, in the same directory,
the memory.60 file. Let's just fill it with a hello world for now:
// memory.60
MainWindow := Window {
    Text {
        text: "hello world";
        color: green;
    }
}
What's still missing is the main.cpp:
// main.cpp

#include "memory.h" // generated header from memory.60

int main() {
    auto main_window = MainWindow::create();
    main_window->run();
}
To recap, we now have a directory with a CMakeLists.txt, memory.60
and main.cpp.
We can now compile and run this program:
cmake -GNinja .
cmake --build .
./memory_game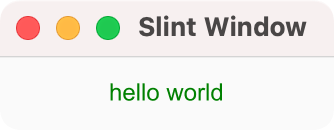
Feel free to use your favorite IDE for this purpose, or use out-of-tree build, or Ninja, ... We just keep it simple here for the purpose of this blog.
Note: When configuring with CMake, the FetchContent module will fetch the source code of SixtyFPS via git. this may take some time. When building for the first time, the first thing that need to be build is the SixtyFPS runtime and compiler, this can take a few minutes.
Memory Tile
With the skeleton in place, let's look at the first element of the game, the memory tile. It will be the
visual building block that consists of an underlying filled rectangle background, the icon image. Later we'll add a
covering rectangle that acts as a curtain. The background rectangle is declared to be 64 logical pixels wide and
tall,
and it is filled with a soothing tone of blue. Note how lengths in the .60 language have a unit, here
the px suffix. That makes the code easier to read and the compiler can detect when your're accidentally
mixing values with different units attached to them.
We copy the following code into the memory.60 file:
MemoryTile := Rectangle {
    width: 64px;
    height: 64px;
    background: #3960D5;

    Image {
        source: @image-url("icons/bus.png");
        width: parent.width;
        height: parent.height;
    }
}

MainWindow := Window {
    MemoryTile {}
}
Inside the Rectangle we place an Image
element that loads an icon with the @image-url() macro. The path is
relative to the folder in which the memory.60 is located. This icon and others we're going to
use later need to be installed first. You can download a Zip
archive that we have prepared and
extract it with the following two commands:
curl -O https://sixtyfps.io/blog/memory-game-tutorial/icons.zip
unzip icons.zip
This should unpack an icons directory containing a bunch of icons.
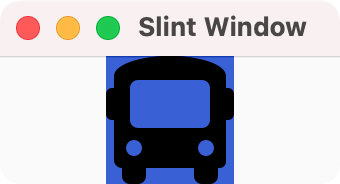
We compile the program with cmake --build . and running with the ./memory_game gives us a
window on the screen that shows the icon of a bus
on a blue background.
Polishing the Tile
Next, let's add a curtain like cover that opens up when clicking. We achieve this by declaring two rectangles
below the Image, so that they are drawn afterwards and thus on top of the image.
The TouchArea element declares a transparent rectangular region that allows
reacting to user input such as a mouse click or tap. We use that to forward a callback to the MainWindow
that the tile was clicked on. In the MainWindow we react by flipping a custom open_curtain property.
That in turn is used in property bindings for the animated width and x properties. Let's look at the two states a bit
more in detail:
| open_curtain value: | false | true |
|---|---|---|
| Left curtain rectangle | Fill the left half by setting the width width to half the parent's width | Width of zero makes the rectangle invisible |
| Right curtain rectangle | Fill the right half by setting x and width to half of the parent's width | width of zero makes the rectangle invisible. x is moved to the right, to slide the curtain open when animated |
In order to make our tile extensible, the hard-coded icon name is replaced with an icon
property that can be set from the outside when instantiating the element. For the final polish, we add a
solved property that we use to animate the color to a shade of green when we've found a pair, later. We
replace the code in the memory.60 file with the following:
MemoryTile := Rectangle {
    callback clicked;
    property <bool> open_curtain;
    property <bool> solved;
    property <image> icon;

    height: 64px;
    width: 64px;
    background: solved ? #34CE57 : #3960D5;
    animate background { duration: 800ms; }


    Image {
        source: icon;
        width: parent.width;
        height: parent.height;
    }

    // Left curtain
    Rectangle {
        background: #193076;
        width: open_curtain ? 0px : (parent.width / 2);
        height: parent.height;
        animate width { duration: 250ms; easing: ease-in; }
    }

    // Right curtain
    Rectangle {
        background: #193076;
        x: open_curtain ? parent.width : (parent.width / 2);
        width: open_curtain ? 0px : (parent.width / 2);
        height: parent.height;
        animate width { duration: 250ms; easing: ease-in; }
        animate x { duration: 250ms; easing: ease-in; }
    }

    TouchArea {
        clicked => {
            // Delegate to the user of this element
            root.clicked();
        }
    }
}
MainWindow := Window {
    MemoryTile {
        icon: @image-url("icons/bus.png");
        clicked => {
            self.open_curtain = !self.open_curtain;
        }
    }
}
Note the use of root and self in the code. root refers to the outermost
element in the component, that's the MemoryTile in this case. self refers
to the current element.
Running this gives us a window on the screen with a rectangle that opens up to show us the bus icon, when clicking on it. Subsequent clicks will close and open the curtain again.
From One To Multiple Tiles
After modeling a single tile, let's create a grid of them. For the grid to be our game board, we need two features:
- A data model: This shall be an array where each element describes the tile data structure, such as the url of the image, whether the image shall be visible and if this tile has been solved. We modify the model from C++ code.
- A way of creating many instances of the tiles, with the above
.60markup code.
In SixtyFPS we can declare an array of structures using brackets, to create a model. We can use the for loop to create many instances of the same element. In .60 the
for loop is declarative and automatically updates when the model changes. We instantiate all the different
MemoryTile elements and place them on a grid based on their index with a
little bit of spacing between the tiles.
First, we copy the tile data structure definition and paste it at top inside the memory.60 file:
// Added:
struct TileData := {
    image: image,
    image_visible: bool,
    solved: bool,
}

MemoryTile := Rectangle {
// ...
Next, we replace the MainWindow := { ... } section
at the bottom of the memory.60 file with the following snippet:
    MainWindow := Window {
    width: 326px;
    height: 326px;

    property <[TileData]> memory_tiles: [
       { image: @image-url("icons/at.png") },
       { image: @image-url("icons/balance-scale.png") },
       { image: @image-url("icons/bicycle.png") },
       { image: @image-url("icons/bus.png") },
       { image: @image-url("icons/cloud.png") },
       { image: @image-url("icons/cogs.png") },
       { image: @image-url("icons/motorcycle.png") },
       { image: @image-url("icons/video.png") },
    ];
    for tile[i] in memory_tiles : MemoryTile {
        x: mod(i, 4) * 74px;
        y: floor(i / 4) * 74px;
        width: 64px;
        height: 64px;
        icon: tile.image;
        open_curtain: tile.image_visible || tile.solved;
        // propagate the solved status from the model to the tile
        solved: tile.solved;
        clicked => {
            tile.image_visible = !tile.image_visible;
        }
    }
}
The for tile[i] in memory_tiles : syntax
declares a variable tile which contains the data of one element from the memory_tiles array,
and a variable i which is the index of the tile. We use the i index to calculate the position
of tile based on its row and column, using the modulo and integer division to create a 4 by 4 grid.
Running this gives us a window that shows 8 tiles, which can be opened individually.
Creating The Tiles From C++
What we'll do is take the list of tiles declared in the .60 language, duplicate it, and shuffle it.
We'll do so by accessing the memory_tiles property from the C++ code. For each
top-level property, a getter and a setter function is generated - in our case get_memory_tiles
and set_memory_tiles. Since memory_tiles is an array in the .60
language, it is represented as a
std::shared_pointer<sixtyfps::Model>.
We can't modify the model generated by the .60, but we can extract the tiles from it, and put it
in a sixtyfps::VectorModel which
inherits from Model. VectorModel allows us to make modifications and we
can use it to replace the static generated model.
We modify the main function like so:
 // main.cpp
#include "memory.h"
#include <random> // Added

int main()
{
    auto main_window = MainWindow::create();
    auto old_tiles = main_window->get_memory_tiles();
    std::vector<TileData> new_tiles;
    new_tiles.reserve(old_tiles->row_count() * 2);
    for (int i = 0; i < old_tiles->row_count(); ++i) {
        new_tiles.push_back(old_tiles->row_data(i));
        new_tiles.push_back(old_tiles->row_data(i));
    }
    std::default_random_engine rng{};
    std::shuffle(new_tiles.begin(), new_tiles.end(), rng);
    auto tiles_model = std::make_shared<
        sixtyfps::VectorModel<TileData>>(new_tiles);
    main_window->set_memory_tiles(tiles_model);

    main_window->run();
}
Running this gives us a window on the screen that now shows a 4 by 4 grid of rectangles, which can show or obscure the icons when clicking. There's only one last aspect missing now, the rules for the game.
Game Logic in C++
We'll implement the rules of the game in C++ as well. The general philosophy of SixtyFPS is that merely the user
interface is implemented in the .60 language and the business logic in your favorite programming
language. The game rules shall enforce that at most two tiles have their curtain open. If the tiles match, then we
consider them solved and they remain open. Otherwise we wait for a little while, so the player can memorize
the location of the icons, and then close them again.
We'll modify the .60 markup in the memory.60 file to signal to the C++ code
when the user clicks on a tile. Two changes to MainWindow are needed: We need to add a
way for the MainWindow to call to the C++ code that it should check if a pair of tiles has been solved. And we need
to add a property that C++ code can toggle to disable further tile interaction, to prevent the player from opening more
tiles than allowed. No cheating allowed! First, we paste the callback and property declarations into MainWindow:
...
MainWindow := Window {
    callback check_if_pair_solved(); // Added
    property <bool> disable_tiles; // Added

    width: 326px;
    height: 326px;

    property <[TileData]> memory_tiles: [
       { image: @image-url("icons/at.png") },
...
The last change to the .60 markup is to act when the MemoryTile signals
that it was clicked on. We add the following handler:
...
MainWindow := Window {
    ...
    for tile[i] in memory_tiles : MemoryTile {
        x: mod(i, 4) * 74px;
        y: floor(i / 4) * 74px;
        width: 64px;
        height: 64px;
        icon: tile.image;
        open_curtain: tile.image_visible || tile.solved;
        // propagate the solved status from the model to the tile
        solved: tile.solved;

        clicked => {
            // old: tile.image_visible = !tile.image_visible;
            // new:
            if (!root.disable_tiles) {
                tile.image_visible = !tile.image_visible;
                root.check_if_pair_solved();
            }
        }
    }
}
On the C++ side, we can now add an handler to the check_if_pair_solved callback, that will check if
two tiles are opened, and if they match, set the solved property to true in the model,
otherwise, start a timer that will turn them back after one second. While the timer is running, we
disable every tile so one cannot click anything during this time.
Insert this code before the main_window->run()
    // ...
    main_window->on_check_if_pair_solved([main_window_weak =
            sixtyfps::ComponentWeakHandle(main_window)] {

        auto main_window = *main_window_weak.lock();
        auto tiles_model = main_window->get_memory_tiles();
        int first_visible_index = -1;
        TileData first_visible_tile;
        for (int i = 0; i < tiles_model->row_count(); ++i) {
            auto tile = tiles_model->row_data(i);
            if (!tile.image_visible || tile.solved)
                continue;
            if (first_visible_index == -1) {
                first_visible_index = i;
                first_visible_tile = tile;
                continue;
            }
            bool is_pair_solved = tile == first_visible_tile;
            if (is_pair_solved) {
                first_visible_tile.solved = true;
                tiles_model->set_row_data(first_visible_index,
                                          first_visible_tile);
                tile.solved = true;
                tiles_model->set_row_data(i, tile);
                return;
            }
            main_window->set_disable_tiles(true);

            sixtyfps::Timer::single_shot(std::chrono::seconds(1),
                [=]() mutable {
                    main_window->set_disable_tiles(false);
                    first_visible_tile.image_visible = false;
                    tiles_model->set_row_data(
                        first_visible_index,
                        first_visible_tile);
                    tile.image_visible = false;
                    tiles_model->set_row_data(i, tile);
                });
        }
    });

    main_window->run();
Notice that we take a weak pointer of our main_window. This is very important
because capturing a copy of the main_window itself within the callback handler would
result in a circular ownership. The MainWindow owns the callback handler, which itself owns a
reference to the MainWindow, which must be weak to avoid a memory leak.
These were the last changes and running the result gives us a window on the screen that allows us to play the game by the rules.
Ideas For The Reader
The game is visually a little bare. Here are some ideas how you could make further changes to enhance it:
- The tiles could have rounded corners, to look a little less sharp. The border-radius property of Rectangle can be used to achieve that.
- In real world memory games, the back of the tiles often have some common graphic. You could add an image with the help of another Image element. Note that you may have to use Rectangle's clip property element around it to ensure that the image is clipped away when the curtain effect opens.
Let us know in the comments on Github Discussions how you polished your code, or feel free to ask questions about how to implement something.
Conclusion
In this tutorial, we have demonstrated how to combine some built-in SixtyFPS elements with C++ code to build a little game. There are many more features that we have not talked about, such as layouts, widgets, or styling. Have a look at the examples in the SixtyFPS repo to see how these look like and can be used, such as the todo example.
A slightly more polished version of this memory puzzle game is available in the SixtyFPS repository. And you can play the wasm version in your browser.
Slint is a Rust-based toolkit for creating reactive and fluent user interfaces across a range of targets, from embedded devices with limited resources to powerful mobile devices and desktop machines. Supporting Android, Windows, Mac, Linux, and bare-metal systems, Slint features an easy-to-learn domain-specific language (DSL) that compiles into native code, optimizing for the target device's capabilities. It facilitates collaboration between designers and developers on shared projects and supports business logic development in Rust, C++, JavaScript, or Python.